nacos 集群部署
本文主要介绍在Centos8 系统中部署 nacos2.2.1集群。一、环境准备
Section titled “一、环境准备”1.1、版本说明
Section titled “1.1、版本说明”| 组件 | 版本 | 备注 |
|---|---|---|
| Centos | CentOS Linux release 8.4.2105 | 请自行搜索安装 |
| Nacos | 2.2.1 | |
| Mysql | 8.0.37 | 请自行搜索安装 |
| openjdk | 1.8.0_312-b07 | 请自行搜索配置 |
1.2、服务部署规划
Section titled “1.2、服务部署规划”| 主机名 | IP | 部署端口 | 路径 | 说明 |
|---|---|---|---|---|
| Centos8 | 173.16.4.130 | 8848 | /opt/nacos | nacos1 |
| Centos8(2) | 173.16.4.131 | 8848 | /opt/nacos | nacos2 |
| Centos8(3) | 173.16.4.132 | 8848 | /opt/nacos | Nacos3 |
| Mac | 127.0.0.1 | 3305 | ~ | 本人在mac电脑中使用docker部署了mysql,端口为3305 |
二、部署安装
Section titled “二、部署安装”2.1、下载并解压
Section titled “2.1、下载并解压”下载 nacos-server-2.2.1.tar.gz ,将压缩包拷贝到服务器中并解压。
[root@centos8 /]# cd /opt/nacos/[root@centos8 nacos]# lsnacos-server-2.2.1.tar.gz[root@centos8 nacos]# tar -zxvf nacos-server-2.2.1.tar.gz[root@centos8 nacos]# ls[root@centos8 nacos]# nacos nacos-server-2.2.1.tar.gz2.2、配置
Section titled “2.2、配置”集群配置
进入 nacos 的 conf 目录,将 cluster.conf.example 拷贝一份,并对 cluster.conf 进行编辑。
[root@centos8 nacos]# cd nacos/conf/[root@centos8 conf]# cp cluster.conf.example cluster.conf[root@centos8 conf]# ll-rw-r--r--. 1 502 games 1224 3月 13 2023 1.4.0-ipv6_support-update.sql-rw-r--r--. 1 502 games 10900 7月 27 21:46 application.properties-rw-r--r--. 1 502 games 9435 3月 17 2023 application.properties.example-rw-r--r--. 1 root root 79 7月 27 21:47 cluster.conf-rw-r--r--. 1 502 games 670 3月 17 2023 cluster.conf.example-rw-r--r--. 1 502 games 8939 3月 17 2023 derby-schema.sql-rw-r--r--. 1 502 games 10825 3月 17 2023 mysql-schema.sql-rw-r--r--. 1 502 games 31156 3月 17 2023 nacos-logback.xml[root@centos8 conf]# vim cluster.conf修改内容如下:
#2024-07-27T21:47:11.817173.16.4.130:8848173.16.4.131:8848173.16.4.132:8848这里是我们在服务器上运行的三台 nacos 服务实力,IP 地址就是 步骤 1.2 的三个地址。端口号为步骤 1.2 的三个端口号。
文件属性配置
文件属性配置主要修改 application.properties 文件。
[root@centos8 conf]# vim application.properties数据源配置:
#*************** Config Module Related Configurations ***************#### If use MySQL as datasource:### Deprecated configuration property, it is recommended to use `spring.sql.init.platform` replaced.spring.datasource.platform=mysql#spring.sql.init.platform=mysql
### Count of DB:db.num=1
### Connect URL of DB:db.url.0=jdbc:mysql://192.168.15.89:3305/nacos?characterEncoding=utf8&connectTimeout=1000&socketTimeout=3000&autoReconnect=true&useUnicode=true&useSSL=false&serverTimezone=UTCdb.user=rootdb.password=123456
### Connection pool configuration: hikariCPdb.pool.config.connectionTimeout=30000db.pool.config.validationTimeout=10000db.pool.config.maximumPoolSize=20db.pool.config.minimumIdle=2
鉴权配置:
nacos 提供鉴权实现,我们需要开启鉴权,同时自定义用于生成 JWT 令牌的密钥。1.4.1 版本开始,nacos添加服务身份识别功能,用户可以自己配置服务端的 identity, 不再使用 userAgent 作为服务端请求的判断标准。
配置信息如下:
### The auth system to use, currently only 'nacos' and 'ldap' is supported:nacos.core.auth.system.type=nacos
### If turn on auth system:nacos.core.auth.enabled=true
### Since 1.4.1, worked when nacos.core.auth.enabled=true and nacos.core.auth.enable.userAgentAuthWhite=false.### The two properties is the white list for auth and used by identity the request from other server.nacos.core.auth.server.identity.key=nacosnacos.core.auth.server.identity.value=nacos
### The default token (Base64 String):nacos.core.auth.plugin.nacos.token.secret.key=U2VjcmV0S2V5aGFma3NhZmtkYWtma2FrZmFranNkZml3dWJzZGZhc2RmYXNkZiA=
注意:集群中的所有配置文件都要配置相同的 server.identity 信息,否则可能导致服务端之间数据不一致或无法删除实例等问题。具具体可以参考 https://nacos.io/zh-cn/docs/v2/guide/user/auth.html 开启服务身份识别功能模块。
启动之前防火墙需要放开端口 8848,8849 和 9848。
2.3、启动
Section titled “2.3、启动”进入 bin 目录,启动nacos。
[root@centos8 bin]# ./startup.sh/usr/lib/jvm/java-1.8.0-openjdk/bin/java -Djava.ext.dirs=/usr/lib/jvm/java-1.8.0-openjdk/jre/lib/ext:/usr/lib/jvm/java-1.8.0-openjdk/lib/ext -server -Xms2g -Xmx2g -Xmn1g -XX:MetaspaceSize=128m -XX:MaxMetaspaceSize=320m -XX:-OmitStackTraceInFastThrow -XX:+HeapDumpOnOutOfMemoryError -XX:HeapDumpPath=/opt/nacos/nacos/logs/java_heapdump.hprof -XX:-UseLargePages -Dnacos.member.list= -Xloggc:/opt/nacos/nacos/logs/nacos_gc.log -verbose:gc -XX:+PrintGCDetails -XX:+PrintGCDateStamps -XX:+PrintGCTimeStamps -XX:+UseGCLogFileRotation -XX:NumberOfGCLogFiles=10 -XX:GCLogFileSize=100M -Dloader.path=/opt/nacos/nacos/plugins,/opt/nacos/nacos/plugins/health,/opt/nacos/nacos/plugins/cmdb,/opt/nacos/nacos/plugins/selector -Dnacos.home=/opt/nacos/nacos -jar /opt/nacos/nacos/target/nacos-server.jar --spring.config.additional-location=file:/opt/nacos/nacos/conf/ --logging.config=/opt/nacos/nacos/conf/nacos-logback.xml --server.max-http-header-size=524288nacos is starting with clusternacos is starting,you can check the /opt/nacos/nacos/logs/start.out查看启动日志:
[root@centos8 logs]# cd /opt/nacos/nacos/logs/[root@centos8 logs]# tail -2000f start.out/usr/lib/jvm/java-1.8.0-openjdk/bin/java -Djava.ext.dirs=/usr/lib/jvm/java-1.8.0-openjdk/jre/lib/ext:/usr/lib/jvm/java-1.8.0-openjdk/lib/ext  -server -Xms2g -Xmx2g -Xmn1g -XX:MetaspaceSize=128m -XX:MaxMetaspaceSize=320m -XX:-OmitStackTraceInFastThrow -XX:+HeapDumpOnOutOfMemoryError -XX:HeapDumpPath=/opt/nacos/nacos/logs/java_heapdump.hprof -XX:-UseLargePages -Dnacos.member.list= -Xloggc:/opt/nacos/nacos/logs/nacos_gc.log -verbose:gc -XX:+PrintGCDetails -XX:+PrintGCDateStamps -XX:+PrintGCTimeStamps -XX:+UseGCLogFileRotation -XX:NumberOfGCLogFiles=10 -XX:GCLogFileSize=100M -Dloader.path=/opt/nacos/nacos/plugins,/opt/nacos/nacos/plugins/health,/opt/nacos/nacos/plugins/cmdb,/opt/nacos/nacos/plugins/selector -Dnacos.home=/opt/nacos/nacos -jar /opt/nacos/nacos/target/nacos-server.jar  --spring.config.additional-location=file:/opt/nacos/nacos/conf/ --logging.config=/opt/nacos/nacos/conf/nacos-logback.xml --server.max-http-header-size=524288
         ,--.       ,--.'|   ,--,:  : |                                           Nacos 2.2.1,`--.'`|  ' :                       ,---.               Running in cluster mode, All function modules|   :  :  | |                      '   ,'\   .--.--.    Port: 8848:   |   \ | :  ,--.--.     ,---.  /   /   | /  /    '   Pid: 7398|   : '  '; | /       \   /     \.   ; ,. :|  :  /`./   Console: http://173.16.4.130:8848/nacos/index.html'   ' ;.    ;.--.  .-. | /    / ''   | |: :|  :  ;_|   | | \   | \__\/: . ..    ' / '   | .; : \  \    `.      https://nacos.io'   : |  ; .' ," .--.; |'   ; :__|   :    |  `----.   \|   | '`--'  /  /  ,.  |'   | '.'|\   \  /  /  /`--'  /'   : |     ;  :   .'   \   :    : `----'  '--'.     /;   |.'     |  ,     .-./\   \  /            `--'---''---'        `--`---'     `----'
2024-07-27 23:10:56,152 INFO The server IP list of Nacos is [173.16.4.130:8848, 173.16.4.131:8848, 173.16.4.132:8848]
2024-07-27 23:10:57,153 INFO Nacos is starting...
nacos 以集群方式启动,登陆控制台 (http://173.16.4.130:8848/nacos/index.htm),如下图:
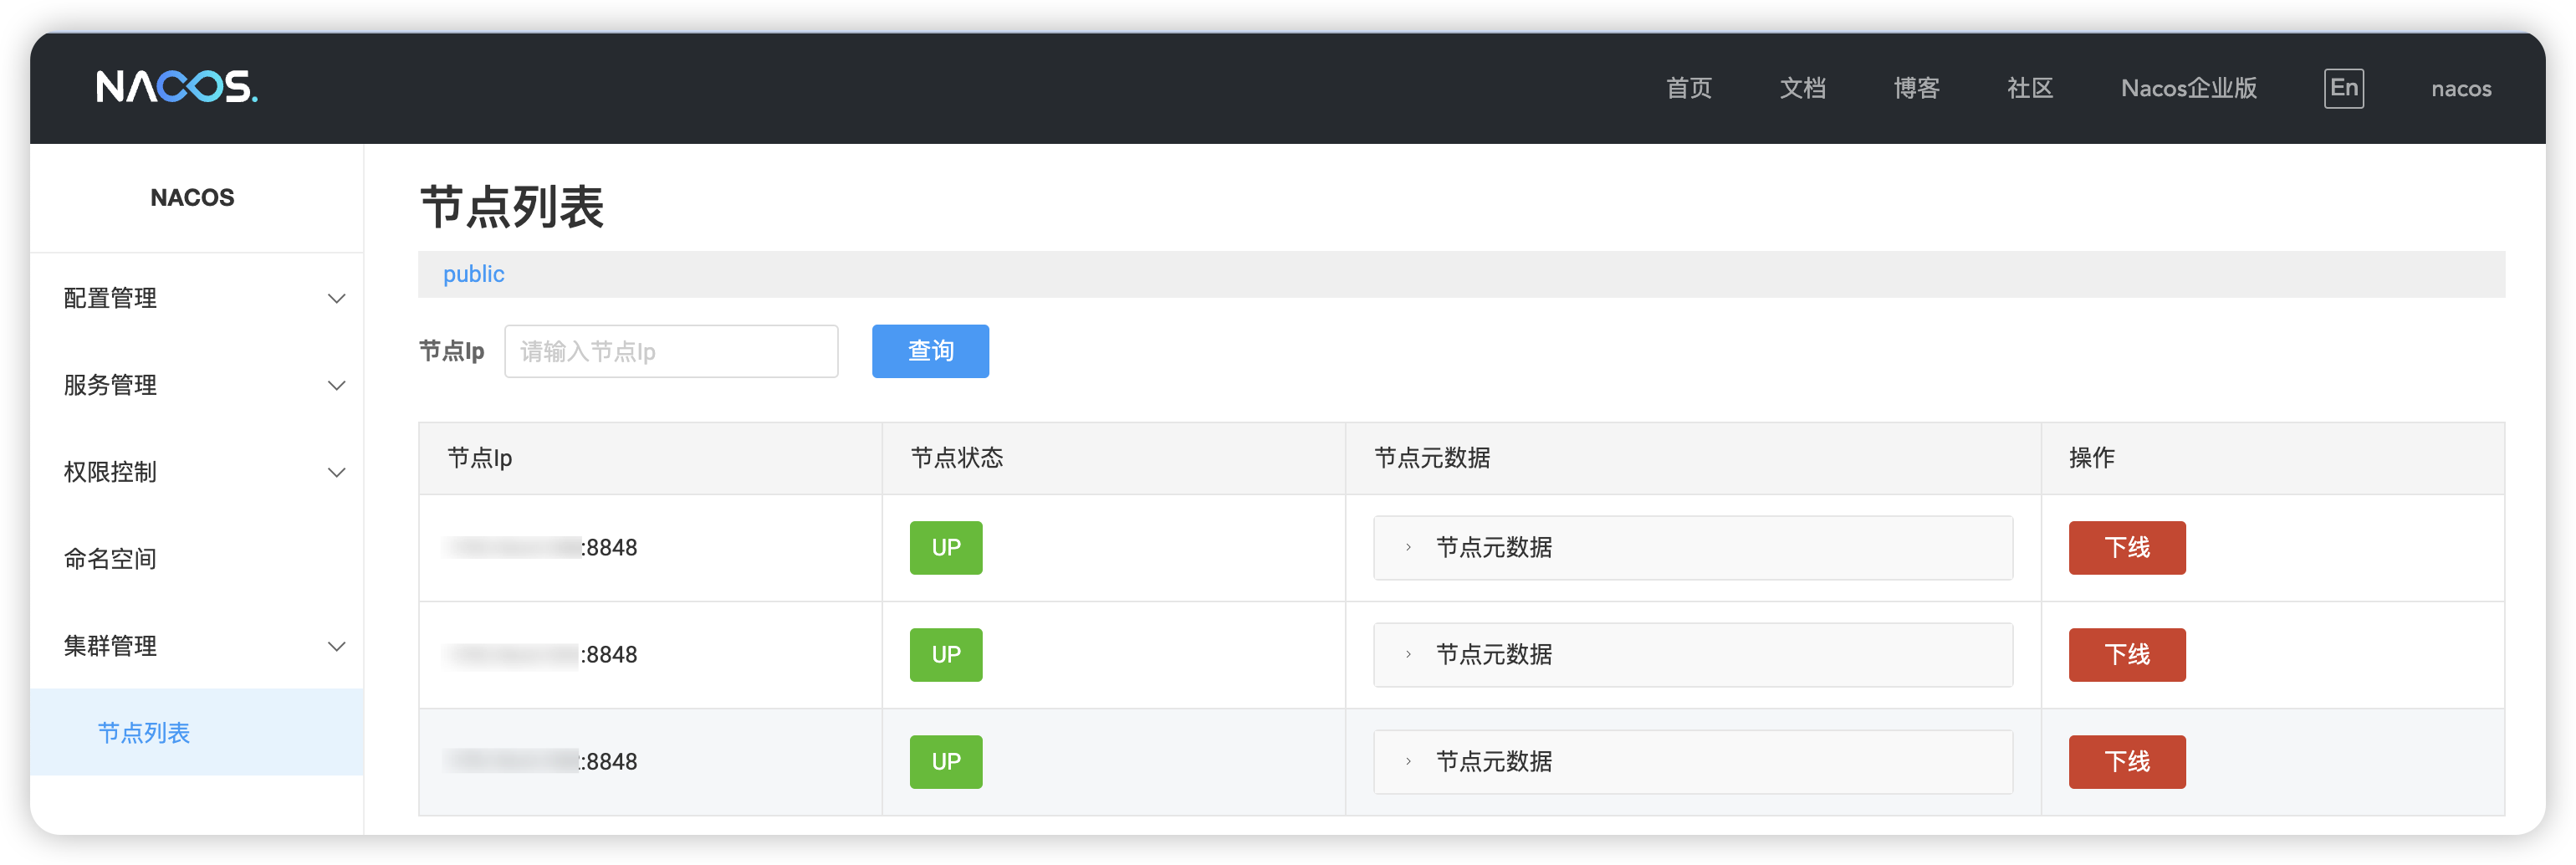
按照上述操作启动其他两台 nacos,当启动其他的 nacos 服务时,节点状态会从 DOWN 变为 UP。
三、增加systemd管理
Section titled “三、增加systemd管理”3.1、 编写启动文件
Section titled “3.1、 编写启动文件”[root@centos8 ~]# vim /etc/systemd/system/nacos.service3.2、在文件中写入以下内容
Section titled “3.2、在文件中写入以下内容”[Unit]Description=nacosAfter=network.target
[Service]Type=forkingExecStart=/opt/nacos/nacos/bin/startup.shExecReload=/opt/nacos/bacos/bin/shutdown.shExecStop=/opt/nacos/bin/shutdown.shPrivateTmp=true
[Install]WantedBy=multi-user.target其中 /opt/nacos 为本机按照的 nacos 文件路径,-m standalone,表示作为单机启动,不加代表以集群启动,此处以集群启动。
3.3、设置开机启动
Section titled “3.3、设置开机启动”# 重启守护现场,进行文件生效配置[root@centos8 ~]# systemctl daemon-reload# 设置为开机启动[root@centos8 ~]# systemctl enable nacos.service# 启动 nacos 服务[root@centos8 ~]# systemctl start nacos.service# 停止 nacos 服务[root@centos8 ~]# systemctl stop nacos.service# 重启服务器[root@centos8 ~]# reboot# 查看 nacos 状态[root@centos8 ~]# systemctl status nacos.service